I work at zen8labs as a mobile developer. The need to make mock A.P.I responses has become increasingly crucial for efficient testing and development workflows. While various tools offer powerful capabilities for intercepting and modifying HTTP traffic, they often come with an expensive price tag. This is where mitmproxy steps in as a cost-effective and feature-rich alternative.
Why Mitmproxy?
The limitations of other tools in Free License
ProxyMan, while being a powerful tool, faces limitations when it comes to mocking multiple requests simultaneously. This constraint can hinder developers who require the ability to mock various API responses concurrently.
On the other hand, Charles, despite its robust features, forces time restrictions in its free version. This limitation can be a roadblock for developers who need extended periods for testing and development without incurring additional costs.
Why Mitmproxy?
Choosing the right tool for intercepting and mocking A.P.I responses is essential, especially when budget constraints or functionality restrictions come into play. Mitmproxy stands out by offering a balance between powerful features and a cost-effective solution.
Key Advantages of Mitmproxy
- Cost-Effective: Mitmproxy is an open source. Ensuring that developers can harness its capabilities without the financial burden associated with premium alternatives.
- Multiple Request Mocking: Unlike some tools that limit the ability to mock multiple requests simultaneously. Mitmproxy excels in providing flexibility for diverse testing scenarios.
- No Time Restrictions: Developers using mitmproxy won’t encounter time constraints in the free version. Allowing for extensive testing and development without interruptions.
Start using Mitmproxy
1. Installation
Begin by installing mitmproxy on your machine. Open your terminal or command prompt and run:
pip install mitmproxyThis will install mitmproxy along with its dependencies.
2. Start Mitmproxy
Once the installation is complete, you can start mitmproxy by running the following command:
mitmproxyThis will launch the mitmproxy interactive console, and you’ll start seeing captured requests and responses.
3. Configure Proxy Settings on Your MacBook
- Open the “System Preferences” on your MacBook.
- Go to “Network.”
- Select your connected Wi-Fi network on the left.
- Click on the “Advanced…” button.
- Go to the “Proxies” tab.
- Check the box next to “Web Proxy (HTTP)”.
- In the “Web Proxy Server” field, enter the IP address of your MacBook and set the port to “8080”.
- Check the box next to “Secure Web Proxy (HTTPS)”.
- In the “Secure Web Proxy Server” field, enter the IP address of your MacBook and set the port to “8080”.
- Click “OK” to save the changes.
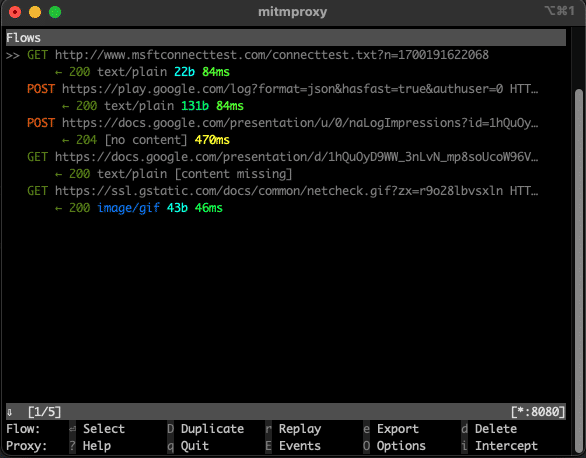
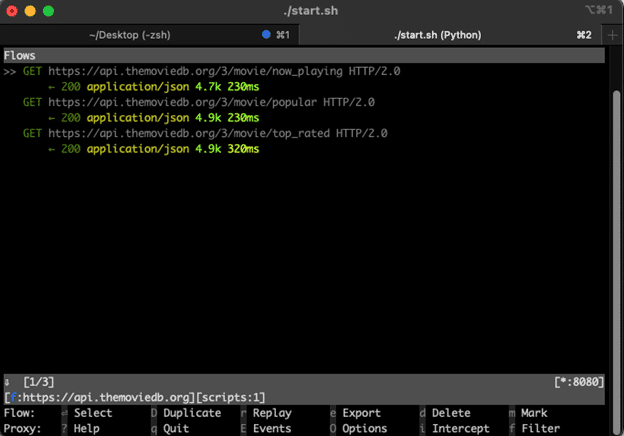
- After this step, you can see requests is showing in mitmproxy UI like this:
4. View https requests in iOS Simulator
I have an iOS application using TMDP API which looks like this:

Now, I want to view HTTP requests in mitmproxy. The next step is to install the certificate on the simulator:
| 1. Open the Safari browser in the iOS Simulator | 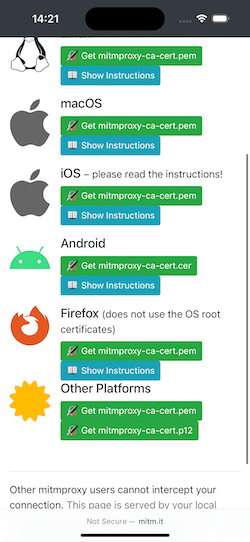 |
| 2. Visit the mitm.it page and download the certificate | 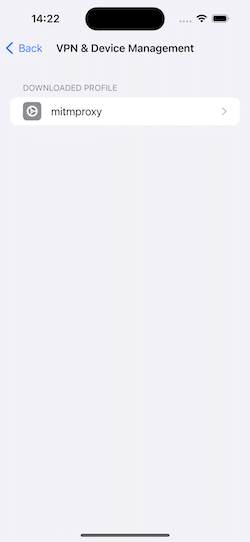 |
| 3. Install and trust this certificate |  |
Now, open the application to trigger an A.P.I call, and the requests will be displayed in mitmproxy:
Modifying Responses based on JSON Configuration
Mitmproxy provides a powerful A.P.I that allows you to create add-ons to intercept, analyze, and modify both requests and responses in real-time. This flexibility enables you to customize the behavior of mitmproxy to suit your specific testing or development needs. In this section, we’ll explore how to create a simple mitmproxy addon to modify requests and responses.
1. Add-on Structure
Update the structure of the addon to read the JSON configuration file:
import json
from mitmproxy import http

class ModifyAddon:
    def __init__(self, config_path="modify_config.json"):
        with open(config_path, "r") as config_file:
            self.config = json.load(config_file)

    def request(self, flow: http.HTTPFlow):
        # Modify request logic goes here

    def response(self, flow: http.HTTPFlow):
        # Modify response logic goes here
2. Modify Response Based on Configuration:
Modify the response method to apply modifications based on the configuration:
def response(self, flow: http.HTTPFlow):
    for rule in self.config:
        if (
            flow.request.method == rule["method"] and
            flow.request.pretty_url == rule["url"]
        ):
            with open(rule["local_file"], "r") as local_file:
                modified_content = local_file.read()
            flow.response.content = modified_content.encode("utf-8")
3. Example Configuration File (modify_config.json):
Create a JSON configuration file specifying rules for response modifications:
[
  {
    "method": "GET",
    "url": "https://api/example",
    "local_file": "example.json"
  },
  {
    "method": "POST",
    "url": "https://api/example",
    "local_file": "example.json"
  }
]
4. Verify the Response
Let open my movie app and click to The Hunger Games: The Ballad of Songbirds & Snakes movie, this screen looks like that the left image.
Next, I created a configuration file like this:
{
    "method": "GET",
    "url": "https://api.themoviedb.org/3/movie/695721?append_to_response=videos,credits,reviews",
    "local_file": "movie-detail.json"
  }
I have then modified the title of the movie in the movie-detail.json file and we can see the result in the right image.


You can see the detail source code here.
Conclusion
As we wrap up our journey through the intricacies of intercepting and modifying API responses, remember that effective testing and development require adaptability. The ability to simulate various scenarios empowers you to create robust and resilient applications.
Happy coding and may your A.P.I responses always be just what you need! If you’re interested in more information, have a look at our other blogs on the zen8labs website.
Quan Nguyen, Mobile Engineer